Use what you have: Dog bed edition
The day before we brought Ketchum home, we realized we were incredibly ill prepared to have a puppy in our house.
We headed to Petco with a list of items that I had compiled from googling "what do puppies need." Its amazing what you can find on the Google.
I found things like: shampoo, collar, leash, food, poop bags, treats, chew toys etc. Very helpful Google.
After wandering through all the aisles at Petco, we left with what seemed to be a truck load full of puppy items, including a ginormous crate.
I'm quite confident that I would actually fit into Ketch's crate. I haven't actually tried to crawl in fully, but I have had to get on my hands and knees and get toys from the back of the crate, which puts me half in and half out, so in a pinch, I could get fully in there, I'm sure of it.
I'm not exactly sure WHY I would need to get in his crate, but it makes me feel good knowing that my dog will be comfy in there for his whole life, unless of course he grows into a monster-dog that is larger than me. Let's all agree that's not going to happen.
Anyway, so a trunk-full and $300 later, we were ready for our new puppy.
After we got home and unloaded all our new items, I realized we were missing a major item from our haul.
A puppy bed/blanket.
In our house blankets (or blankies, as I, very maturely, call them), are VERY important. So important in fact, that I wasn't willing to sacrifice one of our blankets to the dog. I love all my blankets, and I have them in nearly every room, because if I'm sitting down, I am most certainly wrapped up in a blankie (no matter the weather).
Plus, I feel like our newest family member deserved a blankie of his own, not a hand me down one. So, at 8pm at night, I set out to make Ketch a "quick" blanket that we could take with us the next morning when we picked him up.
I headed up to the sewing room/craft room/storage-room-for-all-our-crap/nursery-that-hasn't-been-started-yet and went searching through my fabric pile for quality blankie material.
Yes, I said fabric PILE. My organization skills have taken a serious turn for the worst.
Ugh, this room is such a trash heap that I literally shut the door and try to forget that there is chaos behind it.
I didn't have any pieces of polar fleece that were big enough (which is my go-to blanket fabric), so I created a new plan on a whim.
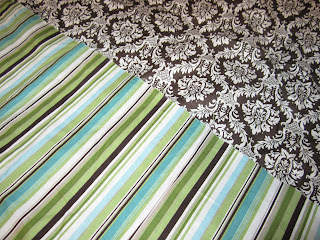
I found some cotton quilting material that I had used a year ago to make my friend Sara a nursing cover for her baby shower. I happened to have a few yards of the patterned fabric and it was just the right size for a dogy blanket.
 Unfortunately 2 pieces of cotton fabric do not a blanket make. I needed some stuffing to beef it up and make it a cozy place for Ketch.
I considered putting batting in between the cotton, but didn't really have enough on hand to make it work, and this was strictly a "use what I have" project (plus I needed to have it done and ready before 8am the next morning).
In my search through the jungle of fabric and crap in that room, I found a bag of random stuff left by the old owners. It was filled with old sheets, some quilts and a twin mattress pad. I had no need for anything in that bag (why hadn't I gotten rid of it when we moved in??), but the mattress pad was perfect for a dog bed and I knew I would never use as a mattress pad.
I cut it down to size to be just smaller than my fabric and set to work sewing it up.

So much for a "quick" project. I was working on this well into the night. Although it took a while, it really was a simple project, I just made it much more complicated by adding a paw print and a "K" to the design.
Step 1: Draw then cut out paw print and K designs (this is what makes this blanket difficult)


Step 4: Turn the fabric right side out and stuff it with the sized-down mattress pad and sew up the bottom of the case with the pad inside
 What is wrong with the picture above? Could it be that I forgot to turn the fabric right-side out? Yeah, that is what happens when you do late night projects with pregnancy brain. This little detour cost me 45 mins of picking out the hem and then redoing it.
Step 5: Sew some "ties" to hold the inside pad in place (I sewed about 10 all around the blanket)

And you're done!
Or not.
I was pleased with my work and we picked up Ketch the next morning and wrapped him in the blanket on our ferry ride home. He seemed to really love his new blanket. So much he proceeded to pee on it.
Oh the life with a puppy. More peed on items than I know what to do with.
Luckily I had planned on needing to wash this blanket on a regular basis, and everything about the blanket was machine washable. So I threw it in the washer and dryer and when I pulled it out I knew I had a problem. The insides were all balled up and I couldn't get them to straighten out.
Some of my ties had broken in the wash and so the pad got all twisted and it was pretty much impossible to untangle. So, I realized I had a design flaw and had to rethink my plan.
So, I had to cut off one end of the blanket, cut any remaining ties, take the pad out, and then start back at step 3 (disregard step 4-6).
I had a helper on this step. Potentially the cutest helper on the planet.
Step 4: (You should be at the inside-out pillow case step) Fold over the edge of the blanket and sew a hem around the unfinished edge of the pillow case.
 Step 5: I happened to have some velcro on hand, but not enough to span the whole width of the opening. So, I cut it into smaller strips and spaced it out evenly across the hem and sewed the velcro onto the hem.

Step 6: Turn the case right-side out, stuff with the pad and seal up the velcro.
And your done AGAIN!


 This is a much better solution, because now I can separate the pad from the case when I wash it, ensuring there is no tangling or balling.
Ta da!
This is such a simple project (which I over complicated of course), but you could make all different things the same way.
In case you were wondering what I did with the other half of the mattress pad (I'm sure you've been dying to know), I actually folded it and covered it with a sheet and I'm using it as a pad on the floor of Ketch's jumbo crate. This mattress pad was a great find (thank you previous owners for leaving very strange items).
And a puppy post wouldn't be complete without a picture of Ketch.
Here he is enjoying his blanket. I love this so much, because I caught him mid puppy romp.

We headed to Petco with a list of items that I had compiled from googling "what do puppies need." Its amazing what you can find on the Google.
I found things like: shampoo, collar, leash, food, poop bags, treats, chew toys etc. Very helpful Google.
After wandering through all the aisles at Petco, we left with what seemed to be a truck load full of puppy items, including a ginormous crate.
I'm quite confident that I would actually fit into Ketch's crate. I haven't actually tried to crawl in fully, but I have had to get on my hands and knees and get toys from the back of the crate, which puts me half in and half out, so in a pinch, I could get fully in there, I'm sure of it.
I'm not exactly sure WHY I would need to get in his crate, but it makes me feel good knowing that my dog will be comfy in there for his whole life, unless of course he grows into a monster-dog that is larger than me. Let's all agree that's not going to happen.
Anyway, so a trunk-full and $300 later, we were ready for our new puppy.
After we got home and unloaded all our new items, I realized we were missing a major item from our haul.
A puppy bed/blanket.
In our house blankets (or blankies, as I, very maturely, call them), are VERY important. So important in fact, that I wasn't willing to sacrifice one of our blankets to the dog. I love all my blankets, and I have them in nearly every room, because if I'm sitting down, I am most certainly wrapped up in a blankie (no matter the weather).
Plus, I feel like our newest family member deserved a blankie of his own, not a hand me down one. So, at 8pm at night, I set out to make Ketch a "quick" blanket that we could take with us the next morning when we picked him up.
I headed up to the sewing room/craft room/storage-room-for-all-our-crap/nursery-that-hasn't-been-started-yet and went searching through my fabric pile for quality blankie material.
Yes, I said fabric PILE. My organization skills have taken a serious turn for the worst.
Ugh, this room is such a trash heap that I literally shut the door and try to forget that there is chaos behind it.
I didn't have any pieces of polar fleece that were big enough (which is my go-to blanket fabric), so I created a new plan on a whim.
I found some cotton quilting material that I had used a year ago to make my friend Sara a nursing cover for her baby shower. I happened to have a few yards of the patterned fabric and it was just the right size for a dogy blanket.

I considered putting batting in between the cotton, but didn't really have enough on hand to make it work, and this was strictly a "use what I have" project (plus I needed to have it done and ready before 8am the next morning).
In my search through the jungle of fabric and crap in that room, I found a bag of random stuff left by the old owners. It was filled with old sheets, some quilts and a twin mattress pad. I had no need for anything in that bag (why hadn't I gotten rid of it when we moved in??), but the mattress pad was perfect for a dog bed and I knew I would never use as a mattress pad.
I cut it down to size to be just smaller than my fabric and set to work sewing it up.

So much for a "quick" project. I was working on this well into the night. Although it took a while, it really was a simple project, I just made it much more complicated by adding a paw print and a "K" to the design.
Step 1: Draw then cut out paw print and K designs (this is what makes this blanket difficult)


Step 2: Iron on designs with hem-tape to secure then in place, then sew designs with a zig-zag stitch (this takes A LOT of patience and time)


Step 3: Place the "good sides" together (inside out) and sew along 3 sides of the fabric (making a large pillow case)
 |
Step 4: Turn the fabric right side out and stuff it with the sized-down mattress pad and sew up the bottom of the case with the pad inside

Step 5: Sew some "ties" to hold the inside pad in place (I sewed about 10 all around the blanket)

And you're done!
Or not.
I was pleased with my work and we picked up Ketch the next morning and wrapped him in the blanket on our ferry ride home. He seemed to really love his new blanket. So much he proceeded to pee on it.
Oh the life with a puppy. More peed on items than I know what to do with.
Luckily I had planned on needing to wash this blanket on a regular basis, and everything about the blanket was machine washable. So I threw it in the washer and dryer and when I pulled it out I knew I had a problem. The insides were all balled up and I couldn't get them to straighten out.
Some of my ties had broken in the wash and so the pad got all twisted and it was pretty much impossible to untangle. So, I realized I had a design flaw and had to rethink my plan.
So, I had to cut off one end of the blanket, cut any remaining ties, take the pad out, and then start back at step 3 (disregard step 4-6).
I had a helper on this step. Potentially the cutest helper on the planet.
 |
| Hey Mom, why are you messing with my blankie?? |


Step 6: Turn the case right-side out, stuff with the pad and seal up the velcro.

And your done AGAIN!


Ta da!
This is such a simple project (which I over complicated of course), but you could make all different things the same way.
In case you were wondering what I did with the other half of the mattress pad (I'm sure you've been dying to know), I actually folded it and covered it with a sheet and I'm using it as a pad on the floor of Ketch's jumbo crate. This mattress pad was a great find (thank you previous owners for leaving very strange items).
And a puppy post wouldn't be complete without a picture of Ketch.
Here he is enjoying his blanket. I love this so much, because I caught him mid puppy romp.

Cannot wait to see him
ReplyDeleteIn a week :)