Putting the pressure back on
All that talk of pressure yesterday, reminded me of how I spent my weekend.
Pressure washing. Yep, my life is a thrill a minute.
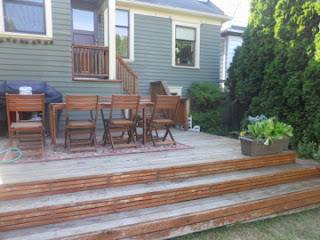
I bet you didn't know this about me, but I am a professional grade power washer. My dad started me power washing many years ago at our cabin, and it has been my official job every year to power wash the deck (hey its better than weeding). Power washing is a lot like painting, it has instant gratification, and it's something that makes a big impact...and we all know how much I like painting.
So power washing our back deck was a piece if cake.... albeit a 3 hour piece of cake.
In case you are not a seasoned power washer, I will break it down for you.
Step 1: Clear the surface of the deck
 |
| Go from this |
 |
| To this. Now its ready for a good wash |
Step 2: Borrow a power washer from my dad (you can borrow one from your dad, my dad doesn't loan to strangers)
Step 3: Realize you don't have a hose, so go buy a new one (maybe that's just me)
Step 4: Put on your power washing outfit (including protective eye ware... of course)
 |
| This is potentially the sexiest outfit EVER. I knew I could use those boots for more than just rainy days. |
Step 5: Wash with short strokes all the way down each board, to get an even cleaning pattern
 |
| The wet part is the clean part...duh |
Step 6: Repeat all along each board until complete... roughly 3 hours for our under 200 sq ft deck
 |
| Wood post wash. Ready for some stain! |
Step 7: lay flat for 10-12 hours, as you won't be able to feel your lower back or upper arms
Then as soon as the feeling in your back and arms return move onto steps 8-10.
Step 8: Sand down the wood to get rid of any splinters that came up during power washing
Step 9: Stain the deck
Step 10: Have a celebratory drink on the newly refinished deck
Step 8 and 9 are a job for another weekend...maybe next weekend.
Until then, I'm going straight to step 10.
Comments
Post a Comment